Mold in a washer gasket is common, especially in front load machines. The rubber seal stays damp and traps detergent, lint, and dirt. This creates the ideal environment for mold to grow. You may notice black spots, a musty smell, or residue on clothes. You can remove mold safely with the right method and prevent it from returning with simple habits.
Why Mold Grows in Washer Gaskets
Front load washers use a thick rubber gasket to seal the door. Water collects in the folds after every cycle. Detergent residue feeds mold growth. Poor ventilation makes the problem worse. Using too much detergent also increases buildup. If you ignore the gasket, mold spreads deeper into the seal and causes strong odors.
What You Need Before You Start
You need basic supplies that are easy to find at home. Use gloves to protect your hands. Use white vinegar or 3 percent hydrogen peroxide as your main cleaner. Keep baking soda for stubborn stains. Use a soft brush or old toothbrush for scrubbing. Use clean cloths for wiping. Keep a spray bottle and warm water nearby. If mold is severe, you can use diluted bleach as a last option. Never mix bleach with vinegar or other cleaners.
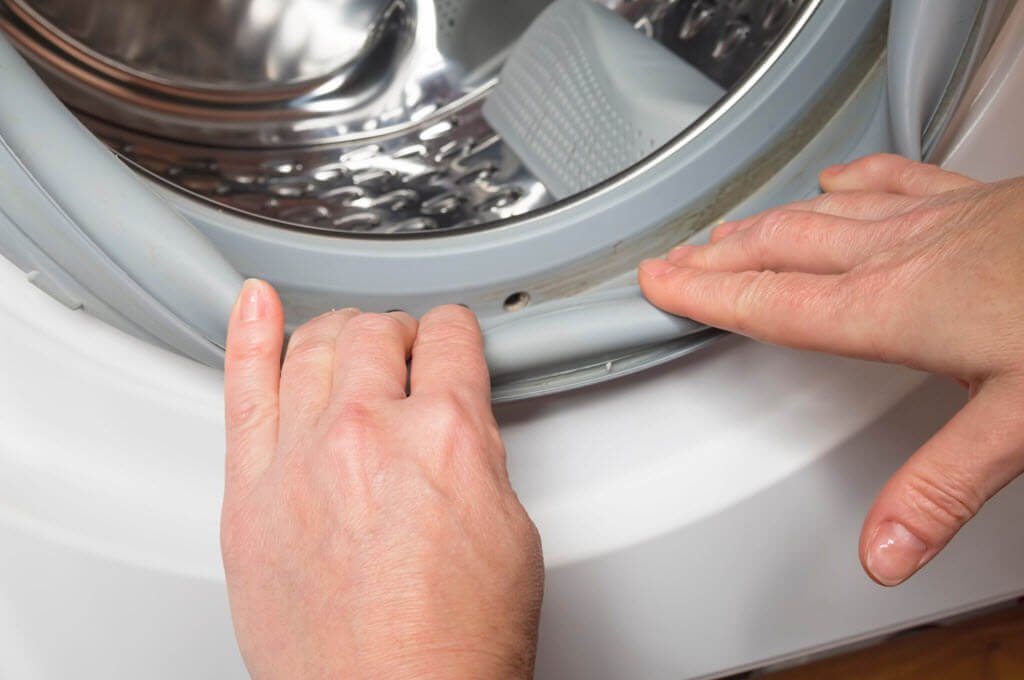
Step 1. Inspect and Remove Loose Debris
Open the washer door and pull back the rubber gasket gently. Look inside the folds. You will often find hair, lint, coins, and soap residue. Remove all loose debris with a dry cloth. This step helps the cleaner reach the mold directly.
Step 2. Apply Vinegar or Hydrogen Peroxide
Pour white vinegar or hydrogen peroxide into a spray bottle. Spray generously into every fold of the gasket. Make sure the liquid reaches the hidden areas. Let it sit for ten to fifteen minutes. This breaks down mold and kills bacteria. If the mold is light, this step alone can deliver visible improvement.
Step 3. Scrub with a Soft Brush
Use a soft brush or toothbrush to scrub the gasket gently. Focus on black spots and stained areas. Do not use a hard brush because it can damage the rubber. Work slowly around the entire seal. Add more cleaner if needed. For thick buildup, mix baking soda with a little water to form a paste. Apply it to stubborn spots and scrub again.
Step 4. Wipe and Rinse Thoroughly
Use a clean damp cloth to wipe away all residue. Rinse the cloth often so you do not spread mold to clean areas. Continue wiping until the gasket looks clean and no cleaner remains. This step matters because leftover residue can attract more dirt later.
Step 5. Use Diluted Bleach Only for Severe Mold
If mold remains after vinegar or peroxide, you can use diluted bleach. Mix one part bleach with ten parts water. Apply carefully to the affected areas only. Keep the room well ventilated. Never mix bleach with vinegar or other cleaners. After a few minutes, wipe the gasket thoroughly with clean water.
Step 6. Run a Hot Cleaning Cycle
After cleaning the gasket, run an empty hot wash cycle. Add two cups of white vinegar to the drum or use a washer cleaner approved by the manufacturer. This helps remove mold spores inside the drum and hoses. Some machines include a self clean cycle. Use it if available.
How to Prevent Mold from Coming Back
Prevention protects your washer and saves time. Simple habits keep the gasket clean and dry.
- Wipe the gasket dry after every wash. This takes less than one minute and reduces moisture buildup.
- Leave the washer door slightly open between cycles. This improves airflow and helps the drum dry faster.
- Use the correct amount of detergent. Too much detergent creates excess foam and residue.
- Avoid leaving wet clothes inside the washer for long periods. Remove laundry soon after the cycle ends.
- Run a monthly maintenance wash with hot water and vinegar or a proper washer cleaner.
- Check the gasket weekly and remove small debris before it turns into buildup.
Common Mistakes to Avoid
Do not ignore early signs of mold. Small black spots can spread quickly. Do not use harsh tools that can tear the rubber. A damaged gasket traps more moisture and may need replacement. Do not mix cleaning products because this creates dangerous fumes. Always use one cleaner at a time and rinse well between products.
When You Should Replace the Gasket
Sometimes cleaning is not enough. If the gasket has deep cracks, strong permanent odor, or mold that returns within days, the rubber may be damaged. A damaged gasket cannot be fully cleaned. Replacement becomes the most practical option. A professional technician can replace the gasket safely and ensure a proper seal.
When to Call a Professional
Call a professional if mold keeps returning despite regular cleaning. You may have hidden mold inside internal parts, hoses, or the drum. A technician can inspect the washer thoroughly, clean internal components, and recommend the right solution. Professional service also helps if you notice leaks, door seal damage, or performance issues.
Final Thoughts
Mold in a washer gasket looks unpleasant and smells worse, but you can fix it with consistent care. Regular cleaning, good ventilation, and correct detergent use protect your washer and your clothes. These habits improve performance and extend machine life. If the problem goes beyond basic cleaning, professional support ensures safe and long term results.